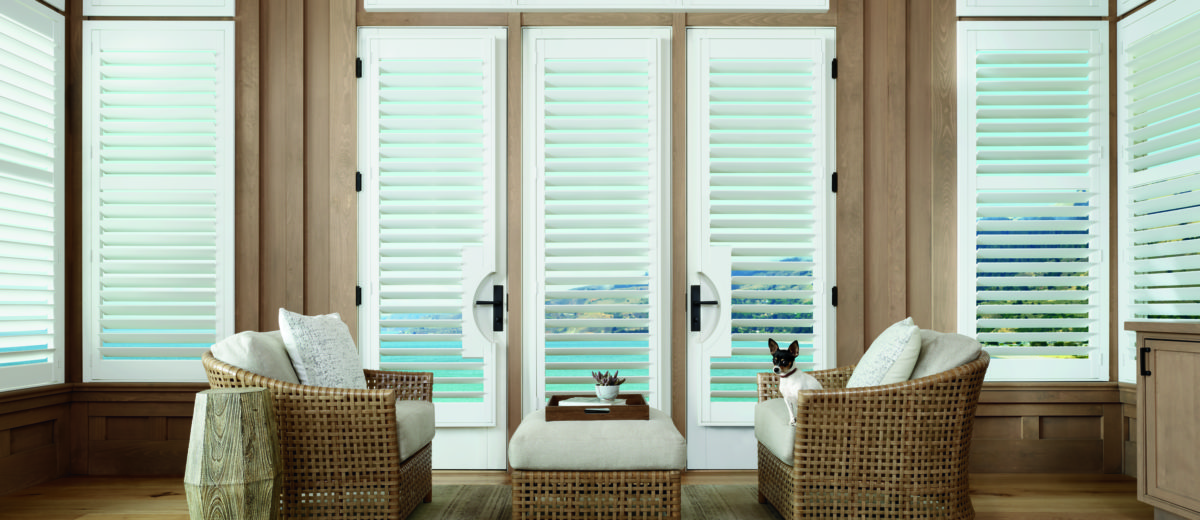
Shutter Terminology
Shutter Panel – Shutter Panel – A shutter panel is part of the shutter that actually swings out of the window (the door of the shutter). The panel is really the ‘gut’ of the shutter. Wood panels can typically span up to 36” without a break, some panels can be made wider but it is highly recommended to stay within industry standard…always keep your panel within 36” to prevent future bowing and warping of panels.
Rails – The top and bottom horizontal structures of a shutter panel
Divider Rails – A divider rail is a no-cost option. It is a stationary horizontal rail in your plantation shutters. It allows the bottom and top louvers to operate independently. This is nice if you want the bottom louvers to be closed for privacy, but the top louvers to be open for light. We can place a divider rail at most any height within the plantation shutters. It is sometimes good to try and line up a divider rail with other divisions already within the window. Also divider rails also provide additional structural strength. A divider rail is usually required for very tall at plantation shutters or at least recommended. One thing to note, even though you had a divider rail, your panel will still swing as one. You will not have a panel that swings independently from the bottom, that is a different panel configuration, called double hung.
Stiles – The main vertical pieces of the framework of a shutter panel.
Louvers – These are the slats of a shutter, generally offered in a 2-1/2″, 3-1/2″, and 4-1/2″ width. Typically elliptical in shape. The louver rotation is used for control of light, privacy and ventilation.
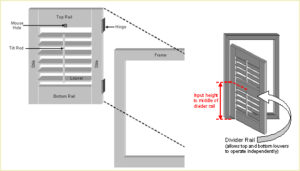
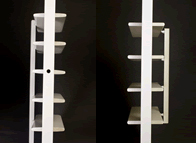
Tilt Bar – Controls the coordinated movement of the louvers for control of light, privacy and ventilation. The control rod is usually mounted on the center of the louver on the face of the panel.
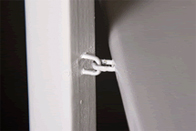
Clear View or RearTilt Option – This is generally an upgraded feature, where the tilt rod or a steel rod is placed on the back part of the shutter, connecting the louvers together in the back rather than the front. This gives a ‘clearer view’ through the shutter louvers, eliminating the vertical obstruction that is inherent with the standard front tilt option. The louvers are tilted open and closed by simply adjusting the center most louver with your hand, ultimately tilting all of the louvers that have a rear connection to that louver.
Rabbeted Center Panel – Special cut that allows panels to overlap each other. Allows for better light blockage and better panel folding.
Double Hung – Double hung shutters consist of separate panels that are hung one on top of the other. With double hung plantation shutters, you can swing open the top portion of the shutter independently from the bottom. However, the things to consider with this option, is that because these are actually separate panels, they are on separate hinge systems. There is also a gap between the top and bottom panels, to allow for separate swinging and because you have to have this gap…the top panel has nothing to rest on. So over time the top panel will sag due to lack of support. Another major issue to address with double hung is the significant light gap that occurs between the top and bottom shutter panels. This gap will vary over time, depending on the amount of sagging that occurs with the hinges on the top panel.
Shutter Panel Configuration and Options
A shutter can have an entirely different look based on the panel configuration of the shutter. Our trained experts can guide you through this process, because the panel configuration is one of the biggest keys in ordering a shutter. In order to figure the best configuration for you we will walk through these basic steps:
- Function – Basically, you need to evaluate the function of the window and the shutter and how you will actually be using the shutter. Will you be swinging the shutter open often or will you be tilting the louvers open and generally keeping your panels closed most of the time? (Most new shutter owners believe that they will be swinging their panels open often, rather than tilting….once the shutters are installed, many times these same clients hardly ever open the panels, unless they clean the window or open the windows).
- Views – Do you have great views that you want to accentuate? Do we need to have the fewest obstructions in the window?
- Privacy – Do you have privacy issues where we would like to enjoy tilting bottom and top louvers independently to give us privacy while still having natural light?
- Style – What type of style or home décor are we coordinating with?
- Size and Shape – How large are your windows and what shape are they? How deep are your window, what type of recess do we have? Are the windows long, skinny, short, wide…arched?
These are just a few of the key elements that are taken into account when we are evaluating the best shutter, the best panel configuration, louver size, tilting options, etc for each of our clients. Call us now and we will find out what the best solution is for you and your windows!
Various Panel Configurations and Options
- Single panel (with and without dividers)
- Double panel (with and without dividers)
- Four panels
- Fully louvered arches (single and double panel)
- Double Panel with Transom Arch
- Stained Single Panel with Divider
- Stained Single Panel, fully louvered arch
- Clearview French door cut out – round
- French door cut out – square
- Custom Trim Build Outs
Other shutter characteristics to be aware of:
Elliptical VS Flat Louvers
Elliptical – Louvers on traditional Plantation Shutters have an elliptical shape. They’re about 1/2″ thick in the middle and taper off at the edges.
Flat – Some manufacturers make louvers with a flat profile because they are much easier to work with. A flat profile is quicker to paint, sand, and stain than an elliptical one, for example.
A Rabbet Cut Makes For A Better Joint

Rabbeted Panel– Shutters are usually built with more than one panel. When two shutter panels meet, there are a couple of ways to join them. The simplest way is to cut each panel so it has a straight, flat edge, and let the two panels butt up against each other. The downside to this approach is that it creates a slight gap between the two panels. A better way to fit the panels together is to rabbet them. A small lip is carved into each panel in such a way that one panel overlaps the other by about 1/4″. The rabbeted panel blocks light and ensures privacy.
Shutter Adjustments
All Shutters Need Periodic Adjustment – Tension control is the balance between how easy it is to move the louvers and how well they stay in position once adjusted. After many years of use, you may find that the tension on a shutter has changed and needs adjusting. Traditionally, manufacturers provide a screw in one or more of the louvers to adjust the tension. You tighten the screw to increase tension; loosen it to decrease tension. Some manufacturers install self-tensioning nylon pins. Once installed, these pins cannot be adjusted. Although they are marketed as never needing maintenance, shutters with these pins actually need their tensioning adjusted about as often as any other shutter. Manufacturers that omit tension screws are doing so for one reason: to reduce their costs.
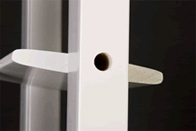
Metal Staples VS Plastic VS Steel Rod In Tilt Rod
Traditional Metal Staples – Traditionally, tilt-rods are connected to the louvers by metal staples. Over time, or in a household with heavy use (such as one with small children), it’s possible for the staples to be pulled out. However, metal staples are easily repaired or replaced. If you ordered your shutters from us, just give us a call…it’s as easy as that!
Beware of Plastic Staples on the Tilt-Rod – The tilt-rod is the vertical piece of wood running down the middle of each panel that attaches to each louver. You use it to adjust the angle of the louvers. There are shutter manufacturers have switched to using plastic staples instead of metal. Not only are the plastic staples more complicated and fragile than their metal counterparts, it is almost impossible to find the parts or someone to fix your shutter when one of those gets damaged.
Beware of Aluminum Plates Inserted into Tilt Rods – There are even manufacturers that have resorted to inserting metal plates into the tilt rod, adhering it with glue hoping that they would have less staple repairs. Often what happens in this scenario is that because of this construction the tilt rod and louvers are now experiencing all of the stress from the tilting, which ultimately leads to the tilt rod breaking apart from the glued metal plate that was inserted. Additionally over time because of this design, the tilt rod can create a ‘buckling’ affect because there is not enough give in the tilt rod/louver attachment, ultimately creating additional stress on the individual louvers which leads to cracking, breaking and splitting of louvers. Now there is much more to deal with than a simple staple replacement, now the tilt rod and louvers need to be replaced!
Stick with the tried and true…go with staples, much less hassle in the end, there is a reason that they have been built this way for over a century.
A Rabbet Cut Makes For A Better Joint
In general, shutter production can take anywhere from 6-12 weeks for a quality shutter. It usually depends on the time of year, holidays, etc. One thing that everyone needs to be aware of is that most blind and shutter dealers quote shutter production time and don’t equate for the rest of the processing time. A good shutter dealer will account for the following steps:
- Final Shutter Measurements
- Final Design Specification for the Shutters
- Ordering the Shutter – submitting all final specs
- Quality Inspection before shutters are shipped or delivered
- Shipping
- Inspection upon delivery
- Schedule installation
These are the main steps that all nationally branded shutters have to go through…it is a process and usually a lengthy one…but it is one worth waiting for.
Remember, shutters are built to withstand the test of time…they need to go through all of the steps to ensure that they will. Don’t try and cheat the process or you will be cheating yourself.